Every home barista knows the frustration: you've just opened a beautiful bag of specialty coffee, you're excited to taste those tasting notes described on the label, but your first few shots taste nothing like you expected. Sour, bitter, thin, or just... off.
The solution isn't better beans or a more expensive machine. It's understanding how to dial in your espresso.
Dialling in is the methodical process of adjusting brewing variables until your espresso tastes balanced and delicious. Professional baristas do this every morning, and with the right approach, you can master it too�often in just 2-3 shots instead of wasting half a bag.
Understanding the Core Variables
Espresso extraction depends on four interconnected variables. Change one, and you affect the others. Understanding this relationship is key to efficient dialling in:
1. Dose (Coffee In)
The weight of dry coffee grounds you put in your portafilter, measured in grams. For most 58mm baskets, this is typically 18-20 grams. The dose should match your basket size�underfilling or overfilling creates problems.
2. Yield (Coffee Out)
The weight of liquid espresso in your cup, also measured in grams. This determines your brew ratio. A 1:2 ratio (18g in ? 36g out) is a great starting point for most coffees.
3. Grind Size
How finely your coffee is ground. This is your primary adjustment tool. Finer grind = slower flow = more extraction. Coarser grind = faster flow = less extraction.
4. Time
How long the water flows through the puck. While often quoted as "25-30 seconds," this is really a result of your other variables, not a target to chase blindly.
The Step-by-Step Dialling In Process
Step 1: Lock Your Dose and Ratio
Choose a dose appropriate for your basket (usually 18g for a standard double) and stick with it. Choose a ratio�1:2 is reliable for most medium roasts. Don't change these while dialling in.
Step 2: Pull a Test Shot
With your dose locked, grind and tamp consistently. Start the shot and time it. Stop when you reach your target yield (36g for an 18g dose at 1:2).
Step 3: Assess and Adjust
Here's where most people get lost. Use these guidelines:
- Shot ran too fast (under 20 seconds)? Grind finer. The water is flowing through too easily.
- Shot ran too slow (over 35 seconds)? Grind coarser. You're choking the machine.
- Shot tastes sour or sharp? You're under-extracting. Try grinding finer or pulling longer.
- Shot tastes bitter or harsh? You're over-extracting. Try grinding coarser or pulling shorter.
Pro Tip
Only change ONE variable at a time. If you adjust both grind and dose simultaneously, you won't know which change made the difference.
Step 4: Purge and Repeat
After adjusting your grinder, purge about 2-3 grams of coffee to clear any old grinds from the previous setting. Then pull another test shot and taste again.
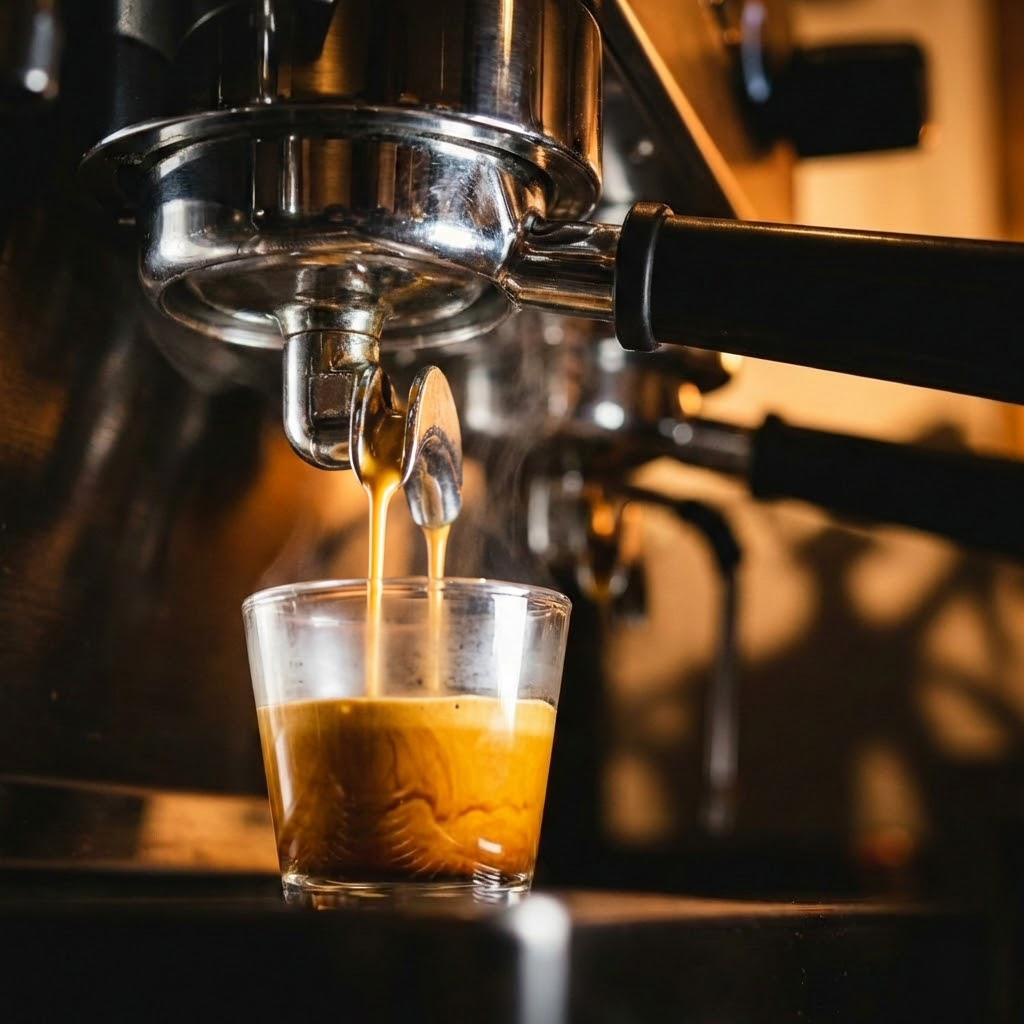
Reading Your Shot: Visual Cues
While weighing and timing are essential, visual cues help you understand what's happening:
- Pale, fast, watery stream: Under-extracted. Grind finer.
- Dark, thick, slow drip: Over-extracted. Grind coarser.
- Golden-brown, consistent stream: You're in the right zone.
- Blonde espresso with tiger striping: Well-extracted, especially for lighter roasts.
Adjusting for Different Coffees
Not all coffees dial in the same way. Here's a quick guide:
Light Roasts
Typically need finer grinds, higher temperatures (94-96�C), and sometimes longer ratios (1:2.5 to 1:3) to fully extract their complex flavors without excessive sourness.
Medium Roasts
The 1:2 ratio at 92-94�C works beautifully for most medium roasts. This is your "standard" espresso profile.
Dark Roasts
Often benefit from slightly coarser grinds, lower temperatures (88-91�C), and shorter ratios (1:1.5 to 1:2) to avoid harsh bitterness.
Common Dialling In Mistakes
1. Changing Too Many Variables
The biggest mistake is adjusting dose, grind, AND yield simultaneously. You'll never learn what actually fixed the problem. Change one thing, taste, repeat.
2. Ignoring Coffee Freshness
Coffee changes as it ages. Beans 3 days off roast behave differently than beans at 14 days. If your shots suddenly taste different, the coffee may have simply aged�adjust your grind accordingly.
3. Inconsistent Puck Prep
Uneven distribution or tamping creates channeling, where water finds "weak spots" and rushes through. This causes uneven extraction regardless of your grind setting. Use a WDT tool and tamp level for consistency.
4. Chasing Numbers Instead of Taste
A 27-second shot at exactly 1:2 can still taste terrible. The numbers are guidelines to get you in the ballpark�your taste buds make the final call.
The One-Variable Method (Simplified)
For beginners, here's the simplest possible approach:
- Lock dose at 18g
- Lock yield at 36g (1:2 ratio)
- Adjust grind until the shot runs in 25-32 seconds
- Taste. If sour, grind finer. If bitter, grind coarser.
- Repeat until delicious
That's it. Master this before adding more complexity. Once your shots consistently taste good with this method, you can experiment with different ratios, temperatures, and more advanced techniques.
Key Takeaways
- Dialling in is about systematically adjusting variables�not guesswork
- Dose and yield should stay fixed while you adjust grind
- Time is an outcome, not a target�focus on taste
- Change only one variable at a time
- Different roast levels need different approaches
- Consistency in puck prep is as important as grind size
With practice, dialling in becomes second nature. You'll learn how your grinder responds, how your machine behaves, and what flavor profiles you prefer. Each new bag becomes an exciting puzzle rather than a frustrating challenge.
And if you want to skip the trial-and-error entirely? Lumo creates custom recipes for your exact equipment, getting you to perfect shots faster than ever.